Baked Protein Pancake Bowls: The Ultimate High-Protein Breakfast Game-Changer

Baked protein pancake bowls have revolutionized breakfast for fitness enthusiasts, busy professionals, and health-conscious families everywhere. This innovative recipe transforms traditional pancakes into convenient, nutrient-dense bowls packed with protein, fiber, and delicious flavors. If you’re tired of boring breakfast options or spending precious morning minutes at the stove, this comprehensive guide reveals the secrets to creating impressive baked protein pancake bowls that deliver restaurant-quality results with minimal effort.
These versatile breakfast bowls combine the comfort of pancakes with the nutritional benefits of protein-packed ingredients, creating a meal that satisfies both taste buds and fitness goals. Whether you’re meal prepping for the week, hosting a brunch, or seeking a quick high-protein breakfast solution, this detailed recipe provides everything you need to succeed. From ingredient selection through creative topping variations, you’ll discover how to create stunning, Instagram-worthy breakfast bowls that keep you satisfied for hours.
Why Baked Protein Pancake Bowls Deserve Your Breakfast Rotation
The popularity of baked protein pancake bowls stems from multiple compelling reasons that make them ideal for modern living. First, they’re incredibly convenient—prepare them once and enjoy multiple servings throughout the week without daily cooking. Second, they’re nutritionally superior to traditional pancakes, providing substantial protein to support muscle recovery and sustained energy throughout your morning.
The time-saving advantage cannot be overstated. Traditional pancakes require standing at the stove, flipping individually, and serving immediately. Baked protein pancake bowls bake simultaneously in one container, then store perfectly for grab-and-go mornings. The make-ahead nature makes them perfect for meal prep enthusiasts seeking stress-free breakfast solutions that don’t compromise on nutrition or taste.
Beyond practicality, baked protein pancake bowls offer remarkable versatility. Customize the pancake base with different protein powders, add various toppings, and create entirely new flavor profiles throughout the week without boredom. They’re equally suitable for post-workout recovery, leisurely weekend brunches, or busy weekday mornings. The impressive presentation makes them Instagram-worthy, inspiring others to adopt healthier breakfast habits.
Understanding the Essential Components
The Protein Pancake Base: The foundation combines eggs, Greek yogurt, and protein powder to create a nutrient-dense batter. This combination provides complete protein, probiotics from yogurt, and customizable flavor through protein powder selection. The ratio ensures proper texture—too much protein powder creates dryness, while insufficient protein reduces nutritional benefits.
The Binding Structure: Eggs provide structure and binding power essential for proper pancake texture. The combination of whole eggs and egg whites offers flexibility—adjust ratios based on preference for fluffiness or density. This component determines whether your pancake bowls have dense, moist texture or lighter, airier consistency.
The Liquid Component: Milk (dairy or non-dairy alternatives) adjusts batter consistency, ensuring proper spreading and baking. The amount varies based on protein powder brand and desired thickness—pancake bowls should be spreadable but not runny.
The Flavor Enhancers: Vanilla extract, cinnamon, and optional sweetener (honey, maple syrup, or sugar-free alternatives) provide depth and appeal without excessive calories. These elements transform basic protein mixture into crave-worthy breakfast.
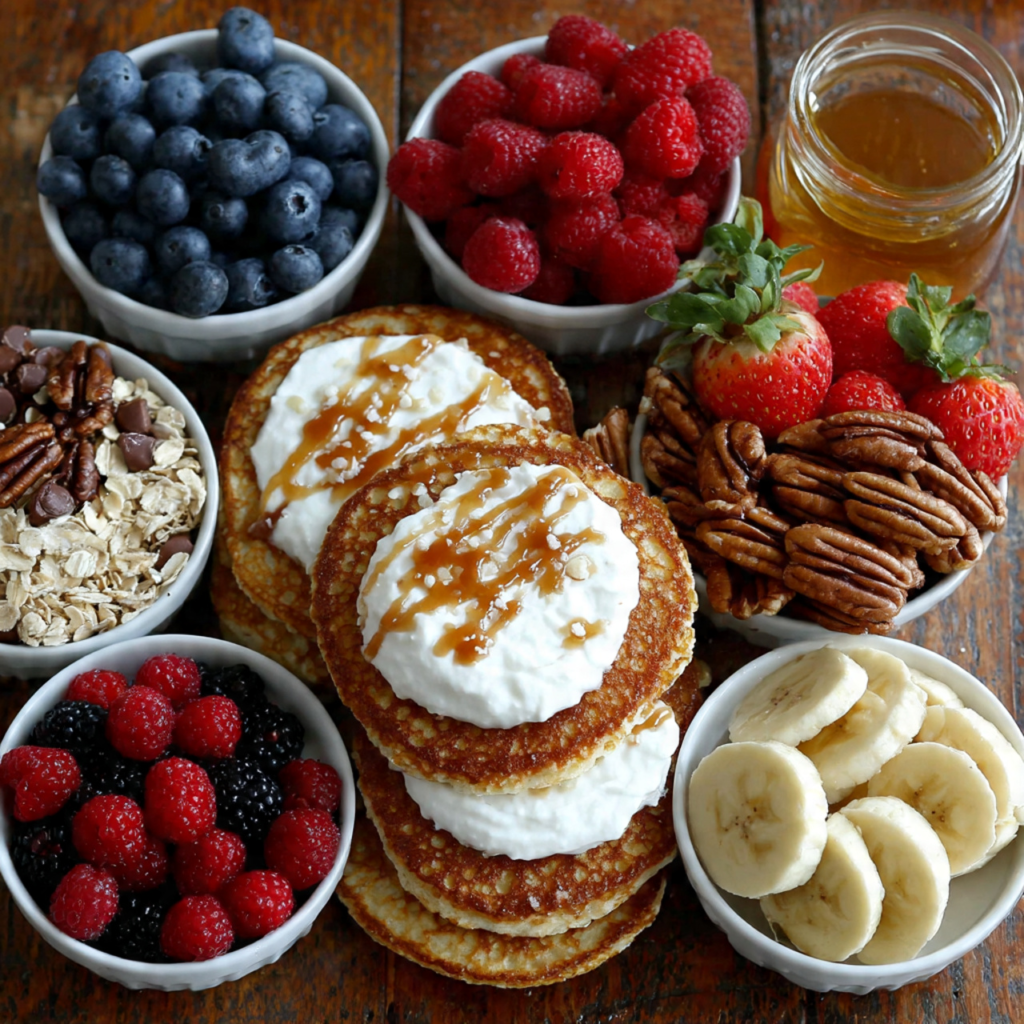
The Nutritious Toppings: Greek yogurt, fresh berries, nuts, seeds, and nut butters add texture, nutrition, and visual appeal. Topping selection determines the final flavor profile and nutritional completeness of your breakfast bowl.
Complete Baked Protein Pancake Bowls Recipe
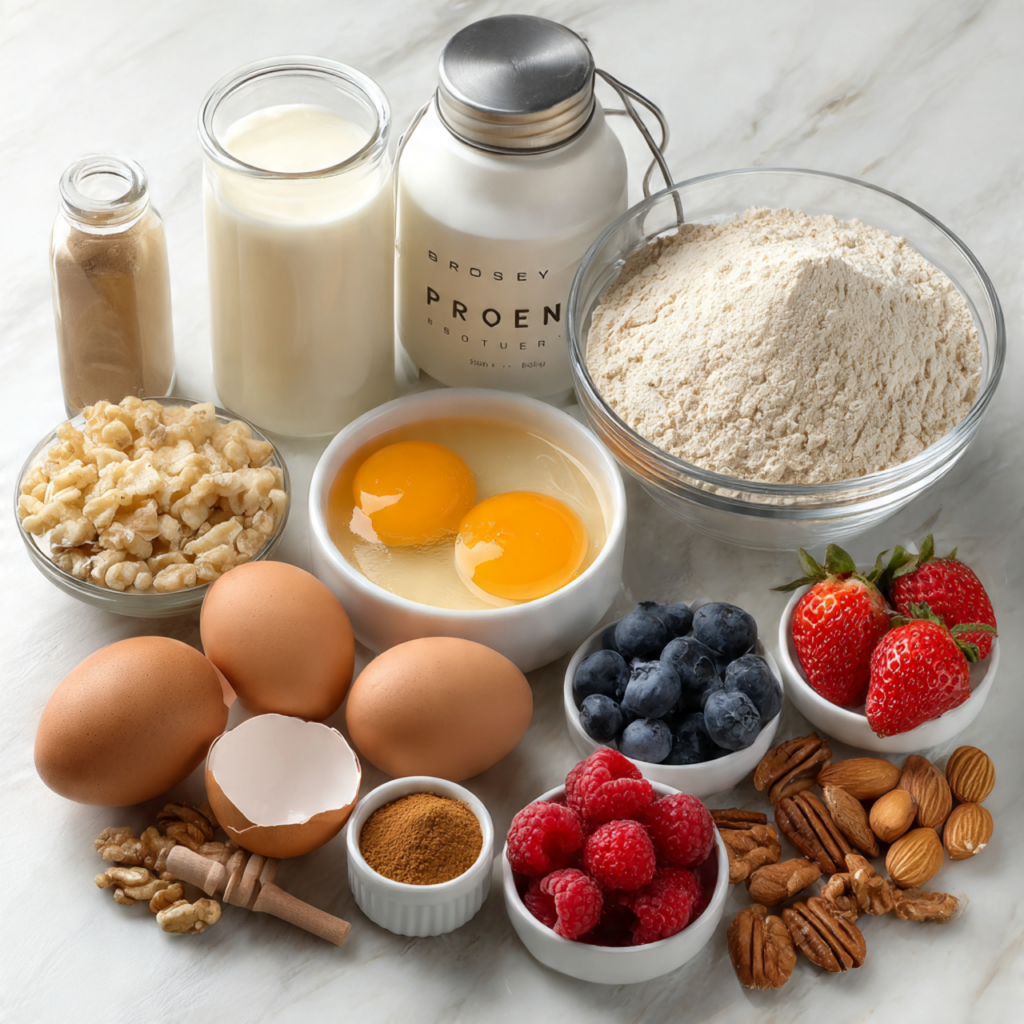
Ingredients
For the Pancake Base:
- 6 large eggs
- ½ cup Greek yogurt (plain, non-fat or full-fat)
- 1 scoop vanilla protein powder (approximately 25-30g protein)
- ½ cup unsweetened almond milk (or milk of choice)
- 1 teaspoon vanilla extract
- 1 teaspoon ground cinnamon
- ½ teaspoon baking powder
- Optional: 1 tablespoon honey or 1-2 tablespoons sugar-free sweetener
- Pinch of kosher salt
- Cooking spray for baking dish
For the Toppings (per serving):
- ¼ cup Greek yogurt
- ½ cup fresh berries (blueberries, strawberries, raspberries)
- ¼ cup granola or nuts (almonds, pecans, walnuts)
- 1 tablespoon almond butter or peanut butter
- Optional: 1 tablespoon dark chocolate chips, coconut flakes, or seeds
Step-by-Step Instructions
Preparation Phase (10 minutes)
- Preheat Oven: Set oven to 350°F (175°C). Line a 9×13-inch baking dish with parchment paper or coat generously with cooking spray to prevent sticking.
- Assemble Dry Ingredients: In a small bowl, whisk together protein powder, baking powder, cinnamon, and kosher salt. This pre-mixing prevents clumping when combined with wet ingredients.
- Combine Wet Ingredients: In a large mixing bowl, whisk together eggs, Greek yogurt, almond milk, and vanilla extract until smooth and well combined. The mixture should be relatively thin but with yogurt visible throughout.
- Blend Batter: Add dry ingredients to wet ingredients, whisking until completely combined. The batter should resemble thick pancake batter—pourable but not watery. If too thick, add additional milk (1 tablespoon at a time); if too thin, add additional protein powder.
- Adjust Sweetness: Taste batter (yes, raw egg batter with pasteurized eggs is safe) and adjust sweetness with honey or sweetener as desired. Remember that toppings will add additional sweetness.
Baking Phase (20-25 minutes)
- Pour Batter: Pour the protein pancake batter into the prepared baking dish, spreading evenly. Use an offset spatula or the back of a spoon to create uniform thickness—approximately ½-inch thick throughout.
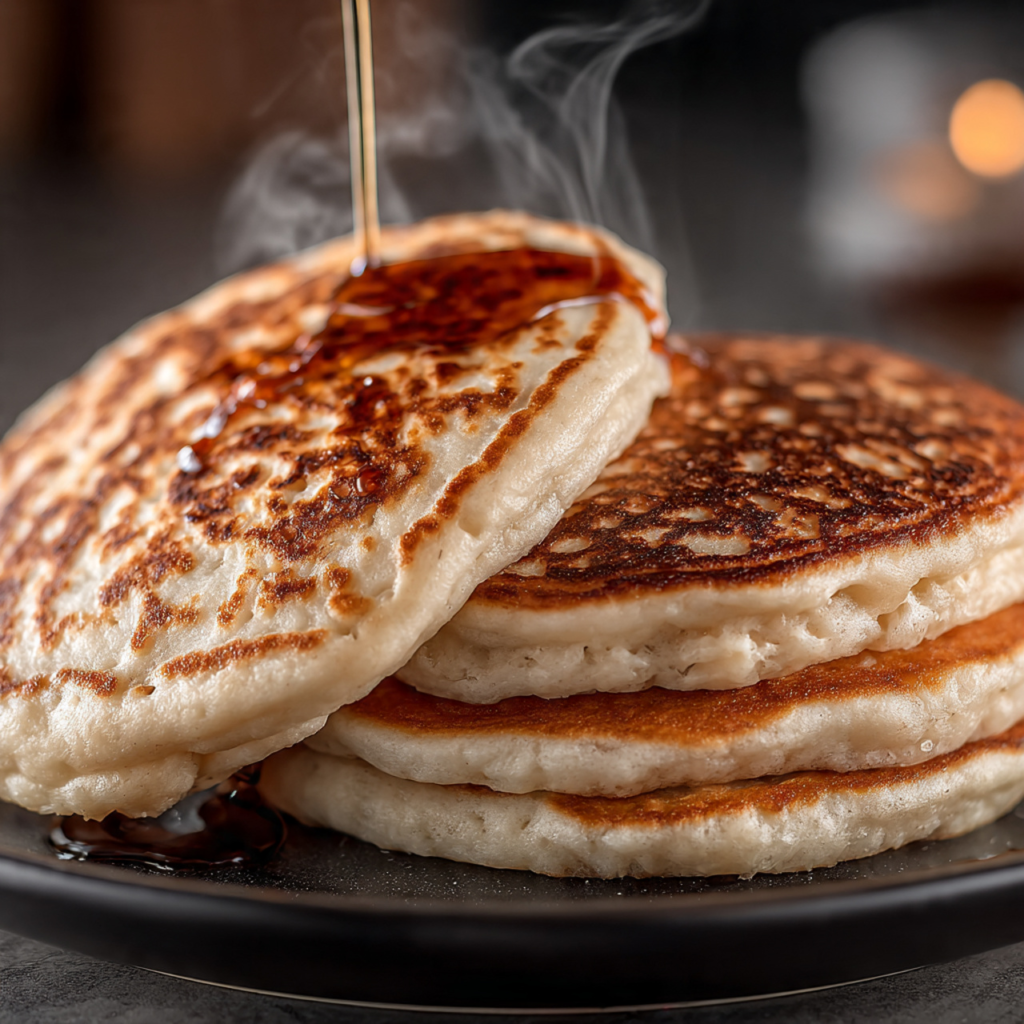
- Bake: Place in preheated 350°F oven and bake for 20-25 minutes until the top is golden brown and a toothpick inserted in the center emerges clean with minimal crumbs. The edges should pull slightly from the sides of the baking dish.
- Cool: Remove from oven and allow to cool in the baking dish for 5-10 minutes. This cooling period makes cutting easier and prevents the protein pancake from falling apart.
- Cut into Bowls: Using a sharp knife, cut the baked pancake into 4-6 equal portions (size depends on preference). You can create square or rectangular pieces—the shape doesn’t matter as long as portions are relatively uniform.
Topping Phase (10 minutes)
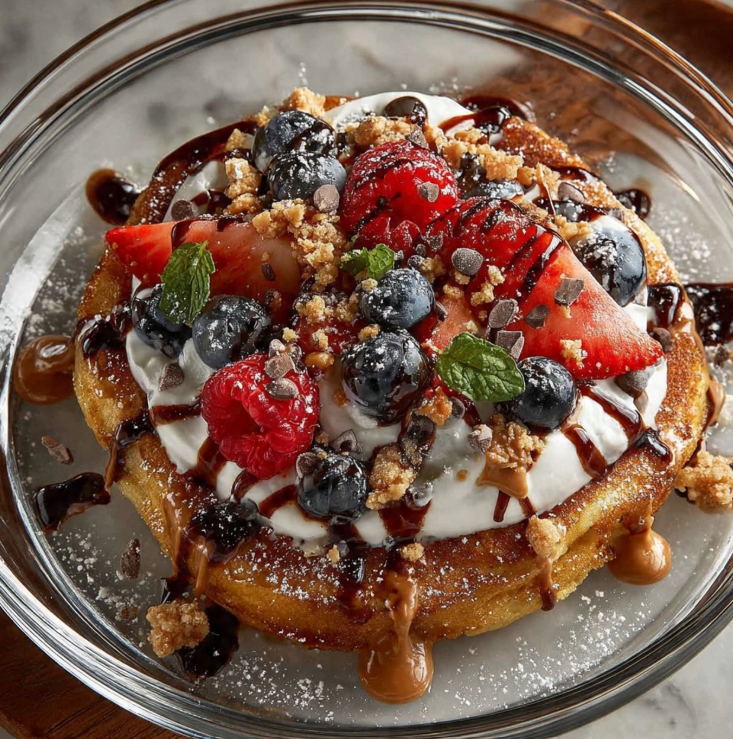
- Transfer to Serving Bowls: Place each cut pancake piece into an individual serving bowl or container. The pancake forms the base of your bowl.
- Add Greek Yogurt: Top each pancake bowl with ¼ cup Greek yogurt, spreading gently to create a creamy layer.
- Add Fresh Berries: Distribute fresh berries across the yogurt layer, creating visual appeal and nutritional boost.
- Add Crunch: Sprinkle granola, nuts, or seeds across the top, adding textural contrast and additional protein.
- Drizzle Nut Butter: Add 1 tablespoon almond butter or peanut butter, drizzling or dotting across the surface for rich flavor and healthy fats.
- Final Touches: Add optional toppings—dark chocolate chips, coconut flakes, or additional seeds—creating Instagram-worthy presentation.
Storage Phase (Preparation for Week)
- Refrigerate: Store completed protein pancake bowls covered in the refrigerator for up to 5 days. The pancake maintains moisture beautifully while the toppings stay fresh.
- Grab and Go: In the morning, grab your prepared bowl directly from the refrigerator or allow 1-2 minutes at room temperature for optimal texture and taste.
Preparation Time Summary:
- Batter preparation: 10 minutes
- Baking: 20-25 minutes
- Cooling: 5-10 minutes
- Topping assembly: 10 minutes
- Total Active Time: 45-55 minutes for 4-6 servings
- Per serving cost: Approximately $2-3 (varies by ingredients)
Professional Baking Techniques for Success
Achieving Perfect Texture: The key to ideal baked protein pancake texture lies in proper ingredient ratios and baking temperature. Too much protein powder creates dense, dry pancakes; too much yogurt creates overly moist texture. The precise combination in this recipe balances these elements perfectly.
Preventing Common Issues: Protein powder can sometimes create a slightly bitter or chalky taste if used excessively. This recipe uses one scoop strategically, combining with other ingredients to create balanced flavor. If your protein powder has strong flavor, reduce quantity slightly and increase milk.
Maximizing Protein Content: While one scoop protein powder provides substantial protein, Greek yogurt adds additional protein and probiotics. This combination creates approximately 25-30g protein per serving—ideal for post-workout recovery or sustained morning satiety.
Proper Cooling: Allowing the pancake to cool slightly makes cutting dramatically easier and prevents breakage. Don’t attempt cutting while piping hot—the protein structure hasn’t fully set, and you’ll end up with crumbled pancake rather than distinct portions.
Creative Flavor Variations
Chocolate Protein Pancake Bowls: Use chocolate protein powder, add 1 tablespoon cocoa powder to batter, and top with dark chocolate pieces, berries, and Greek yogurt.
Banana Bread Variation: Add ½ mashed banana to batter, use vanilla protein, and top with sliced bananas, pecans, and almond butter.
Peanut Butter Cookie Dough: Use vanilla protein, add 2 tablespoons powdered peanut butter to batter, and top with peanut butter, chocolate chips, and granola.
Tropical Paradise: Use vanilla protein, add 1 tablespoon unsweetened coconut to batter, and top with mango, pineapple, coconut flakes, and macadamia nuts.
Berry Blast: Use berry-flavored protein powder, add fresh berries to batter, and top with mixed berries, yogurt, and honey.
Maple Walnut: Use vanilla protein, add 1 tablespoon pure maple syrup to batter, and top with walnuts, maple syrup drizzle, and Greek yogurt.
Meal Prep and Storage Excellence
Refrigerator Storage: Store completed pancake bowls covered for up to 5 days. The protein pancake base maintains moisture beautifully while maintaining structural integrity.
Freezer Option: Freeze the pancake base (without toppings) for up to one month. Thaw in the refrigerator overnight, then add fresh toppings when ready to consume.
Make-Ahead Strategy: Prepare pancake base on Sunday evening, cut into portions Monday morning, and spend 5 minutes Monday-Friday adding different toppings. This approach provides variety without excessive daily cooking.
Troubleshooting Common Issues
Pancakes Too Dense: Likely caused by excessive protein powder or insufficient liquid. Increase milk by ¼ cup and reduce protein powder to ¾ scoop.
Pancakes Too Moist: Reduce Greek yogurt to ⅓ cup or increase baking time by 5 minutes at slightly lower temperature (325°F).
Protein Taste Overpowering: Reduce protein powder to ¾ scoop or increase milk to ¾ cup. Experiment with protein powder brands—flavor varies significantly.
Pancakes Not Baking Through: Ensure oven temperature is accurate using an oven thermometer. If center remains wet while edges brown, lower heat to 325°F and extend baking time.
Conclusion
Baked protein pancake bowls represent the perfect intersection of nutrition, convenience, and deliciousness—exactly what modern healthy eating demands. This make-ahead breakfast solution eliminates morning stress while delivering impressive nutrition that fuels your day with sustained energy and muscle-supporting protein.